How to visualize WRF-Fire output in VAPOR
Jump to navigation
Jump to search
Prerequistes
- A working installation of WRF-Fire, possibly on a remote supercomputer or a cluster.
- A visualization computer with a decent graphics card and drivers (hardware accelerated OpenGL required), 3 button mouse.
- Download and install VAPOR
- Read Getting started with VAPOR first.
- On a Mac, run the installation package, then add to your path /Applications/VAPOR.app/Contents/MacOS
- Do the exercises in the first few pages of the VAPOR quick start guide to learn the basics of the controls.
- VAPOR can be used remotely over a version of VNC with OpenGL support, to avoid transferring huge datasets to your visualization computer.
Directions
- Change in namelist.input the line with history_interval to the desired frame interval in seconds, for example history_interval_s=1. Make sure frames_per_outfile is large enough so that only one wrfout file is produced.
- [[[How to run WRF-Fire|Run WRF-Fire]]. The pictures below are from the "hill" ideal run in WRF-Fire.
- If the visualization computer is different from the computer where you run WRF-Fire, transfer the wrfout file to the visualization computer
- Convert the wrfout file for use with VAPOR: run from the command line
- wrfvdfcreate yourwrfoutfile yourwdffile.vdf
- wrf2vdf yourwdffile.vdf yourwrfoutfile
- Start VAPOR by clicking on its icon or vaporgui from the command line
- In the GUI, click "Data" on the top menu bar, then "load dataset in the current session", and navigate to the yourwdffile.vdf you have just created. In the black right panel, you should see an empty wireframe box from the top.
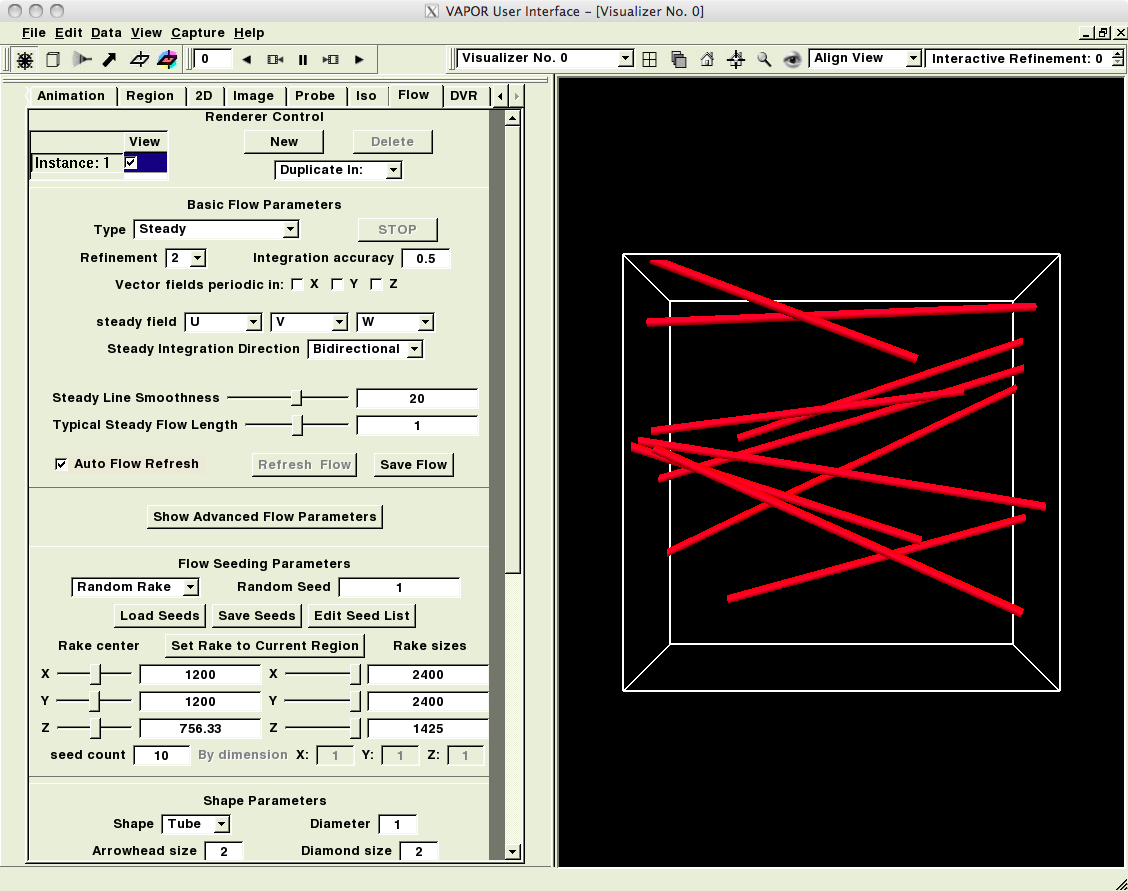
- Click the "Flow" tab, check the box "Instance 1", click "OK" on a warning about flow lines below zero. Select "Refinement" 2. You should see a picture like this (the starting points of the flow lines are picked randomly so they are different in every session):
- Click the "Animation" tab and move the "Frame position" slider to the middle (in the ideal "hill" example), or to a time when you know that the fire has already well developed. The flowlines should move a little.
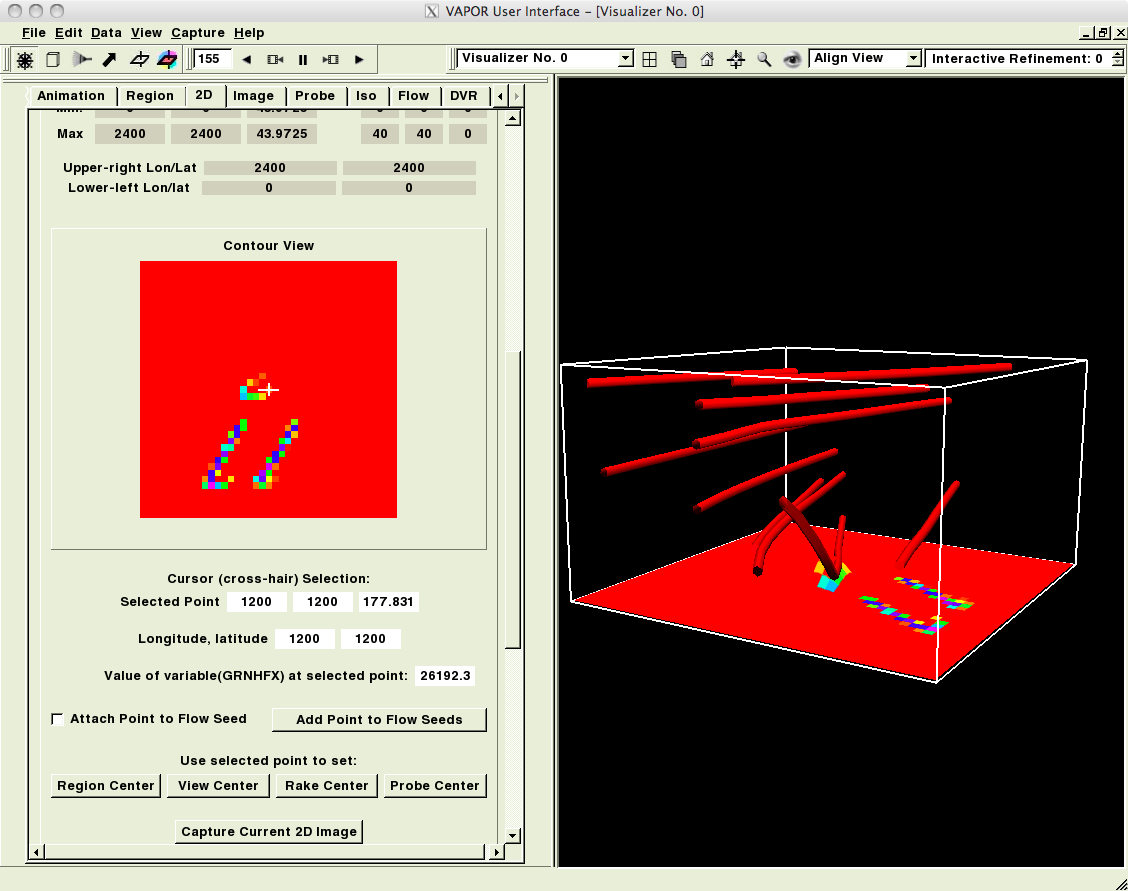
- Click the "2D" tab, check "Instance 1", select "Refinement" 2, and 2D variable GRNHFX, check "Apply color and opacity to terrain surface", and push the "Fit data" button at the bottom.
- Rotate the image with a mouse to see something like this:
- Click on the "Animation" tab, click on the rewind and play VCR controls, and watch the movie. If the movie is too slow, go back to the "Flow" tab and reduce the "Refinement" value.
- To capture the movie, use "Capture", "Begin image capture sequence in visualizer 0", select directory, then run the movie, when done "Capture" "End image capture sequence". You get the movie frames as jpg files.
- Use the DVR tab and other VAPOR features for a more advanced visualization as desired.
Works with
- WRF-Fire May 26 2010 and hopefully later
- VAPOR 1.5.2 and hopefully later
- Tested on MacBook Pro 4GB OS X 10.6 GeForce 8600M GT 512MB

