How to visualize WRF-Fire output in VisTrails
Jump to navigation
Jump to search
Local Simulation Execution
- Download the tar ball ([1])
- Place the VisTrails packages into /Users/XXX/.vistrails/userpackages/
- NumSciPy -- contains the wrapper modules for NumPy and SciPy functions
- WRFtoVTK -- contains the wrf to vtk file conversion modules
- demoNetwork -- contains the client modules to communicate with the server
- extendDialog -- contains masked text dialogs for passwords
- Move the VisTrails workflow to a known location (i.e. /Users/XXX/Desktop/visExample/)
- fireDemoSC2009.vt -- the VisTrails workflow for conversion and visualization
- Move the simulation inputs to a known location (i.e. /Users/XXX/Desktop/visExample)
- sc2009inputs -- contains example simulation input files
- Place the VisTrails packages into /Users/XXX/.vistrails/userpackages/
- Run the simulation with the example inputs (/Users/XXX/Desktop/visExample/sc2009inputs/)
- Wait for the simulation to complete
- Store the WRFOUT within a known directory (i.e. /Users/XXX/Desktop/visExample/sc2009outputs/)
- Setup a directory to save VTK files that will be generated from WRFOUT (i.e. /Users/XXX/Desktop/visExample/sc2009outputs/vtkFiles/)
Visualization of Simulation Results
- Run VisTrails and open the workflow (fireDemoSC2009.vt)
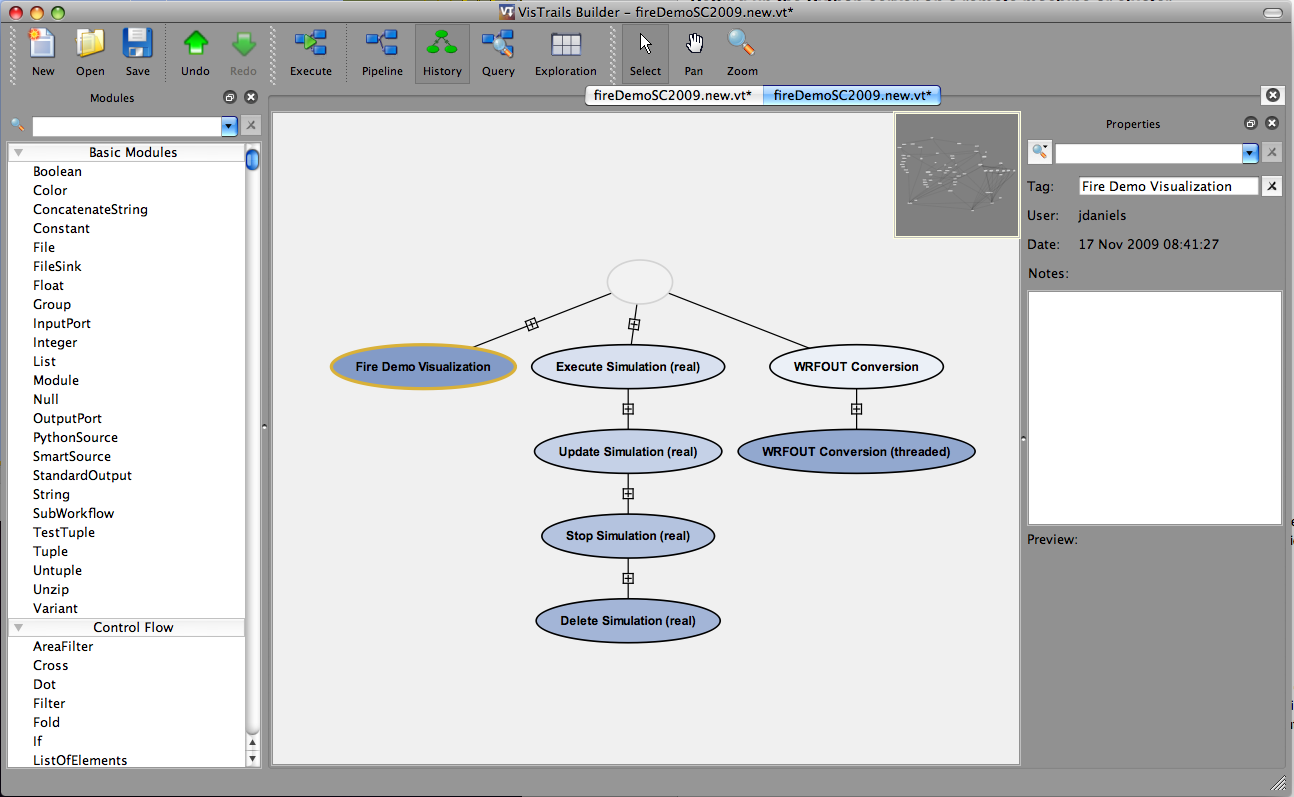
- Begin by navigating the history tree
- Execute the WRFOUT Conversion node (top of the right most branch)
- Prompts for the WRF directory (/Users/XXX/Desktop/visExample/sc2009outputs/)
- Prompts for the VTK directory (/Users/XXX/Desktop/visExample/sc2009outputs/vtkFiles)
- Wait for the conversion to complete (all modules turn green)
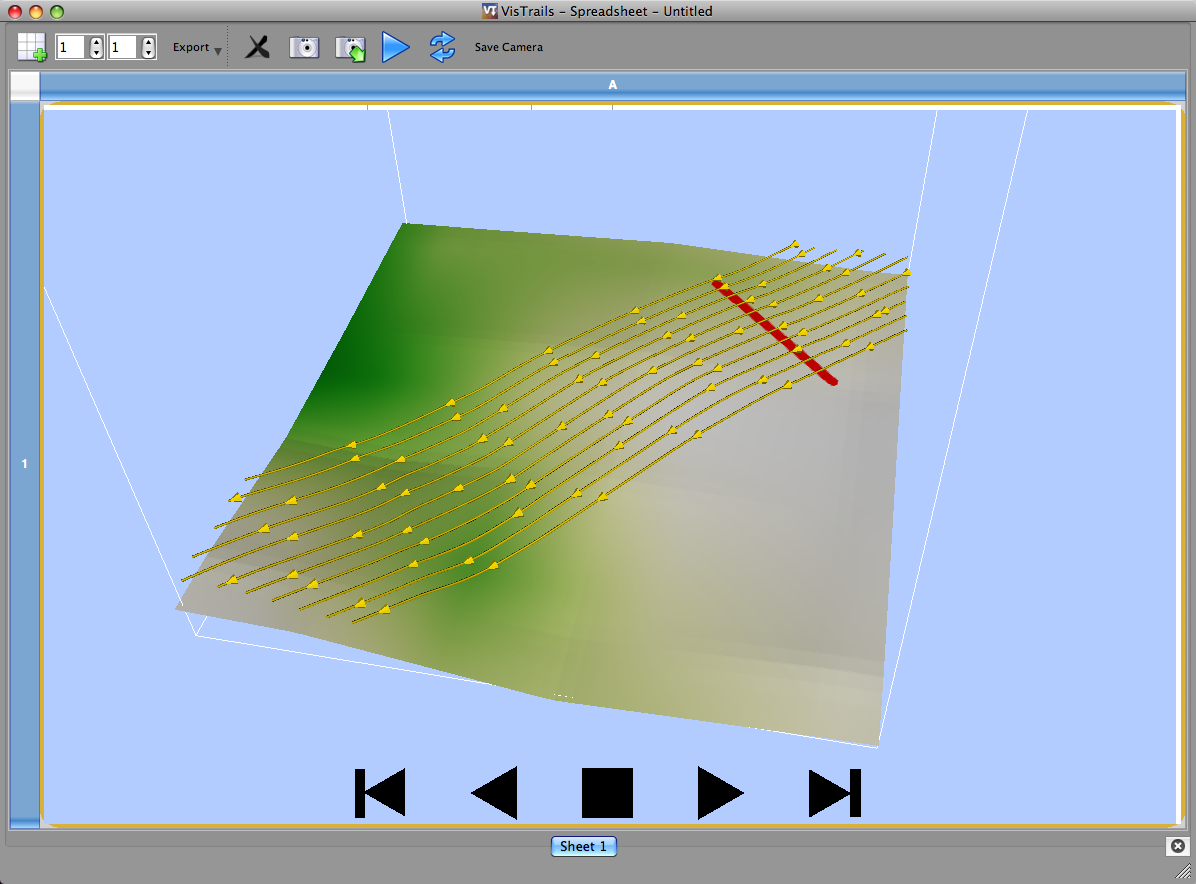
- Execute the Fire Demo Visualization node (top of the left most branch)
- Prompts for the VTK directory (/Users/XXX/Desktop/visExample/sc2009outputs/vtkFiles)
- Prompts for the Animation Delay (hit enter)
- View the spread sheet to interact with the visualization
Cluster-based Simulation Execution
Setting up the Python server on a remote machine or cluster
- Build the simulation binaries on the cluster
- On the cluster setup a home directory for the server
- Within this directory create virtual links to:
- ideal.exe -- the ideal simulation setup executable
- real.exe -- the real simulation setup executable
- wrf.exe -- the simulation binary
- Within this directory copy over the server files from the previous tar ball
- demoNetwork/execServer.py -- to be used on the cluster to launch the server
- demoNetwork/fireServer.py -- the server code
- demoNetwork/fireMessages.py -- the message passing scheme and code
- demoNetwork/userRegistration.py -- user registration script
- demoNetwork/README.txt -- a readme file explaining server setup in more detail
- Execute the python script to start the server (requires python 2.5 or greater)
- On the command line within the directory: python execServer.py
- View and remember the listening port output by the server
Registering New Users with the Server
- Log in to the cluster hosting the server
- Change to the server home directory on the cluster
- Execute the python script for user registration
- On the command line: python userRegistration.py <username> <password>
Executing Remote Simulations
- Run VisTrails and open the workflow (fireDemoSC2009.vt)
- The Execute Simulation (real) node (top of the middle branch): Execution of this workflow sends an execution request to the server. The VisTrails client communicates with the remote server using the md5 checksum of the simulation input files as a unique identifier. The server will execute the simulation IFF it is not already stored within the user database. Consequently, repeated execution requests of the same simulations will be ignored, only the first being executed.
- Prompts for the Server Name
- Prompts for the Username
- Prompts for the Password (this is the user registered password)
- Prompts for the Local Simulation Directory (/Users/XXX/Desktop/visExample/sc2009inputs/)
- Prompts for the Server port (this is the number remembered during server setup)
- The Update Simulation (real) node (upper middle of the middle branch): Execution of this workflow will query the server for the latest WRFOUT files produced by the simulation for the given input files. If the md5 checksum of the WRFOUT does not match between the server and the client, then the file is sent from the cluster to your local machine. No files are sent from the server to the client if the md5 checksums are the same or if the server does not have a simulation recorded for the given input files.
- Prompts for the Server Name
- Prompts for the Username
- Prompts for the Password (this is the user registered password)
- Prompts for the Local Simulation Directory (/Users/XXX/Desktop/visExample/sc2009inputs/)
- Prompts for the Server port (this is the number remembered during server setup)
- The Stop Simulation (real) node (lower middle of the middle branch): Execution of this workflow will send a termination request of the simulation to the server. For simulations that run indefinitely, or are running for a long time, the user can explicitly terminate their continued computation. The workflow prompts the user for the local directory of the input files, used as a means of identifying the simulation to which the user is referring.
- Prompts for the Server Name
- Prompts for the Username
- Prompts for the Password (this is the user registered password)
- Prompts for the Local Simulation Directory (/Users/XXX/Desktop/visExample/sc2009inputs/)
- Prompts for the Server port (this is the number remembered during server setup)
- The Delete Simulation (real) node (lower middle of the middle branch): Execution of this workflow will send a deletion request of the simulation to the server. After a simulation is run, it will remain on the server until it is explicitly deleted by the user. Consequently, if a user terminates a simulation, then wishes to re-run the simulation, they must first delete it. Otherwise, subsequent re-runs of the simulation will not occur because the server views the simulation as already executed.
- Prompts for the Server Name
- Prompts for the Username
- Prompts for the Password (this is the user registered password)
- Prompts for the Local Simulation Directory (/Users/XXX/Desktop/visExample/sc2009inputs/)
- Prompts for the Server port (this is the number remembered during server setup)
Super Computing 2009 Demo
- A full simulation to visualization scenario:
- Execute the Execute Simulation (real) workflow
- Wait.
- Execute the Update Simulation (real) workflow
- Execute the WRFOUT Conversion workflow
- Execute the Fire Demo Visualization workflow

